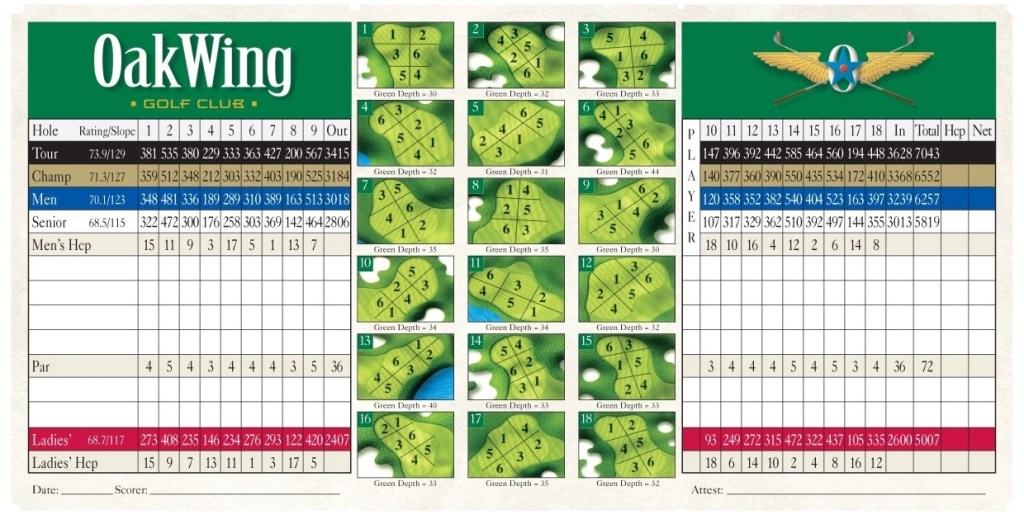
Hole descriptions and best play tips
Click on the images below to enlarge.
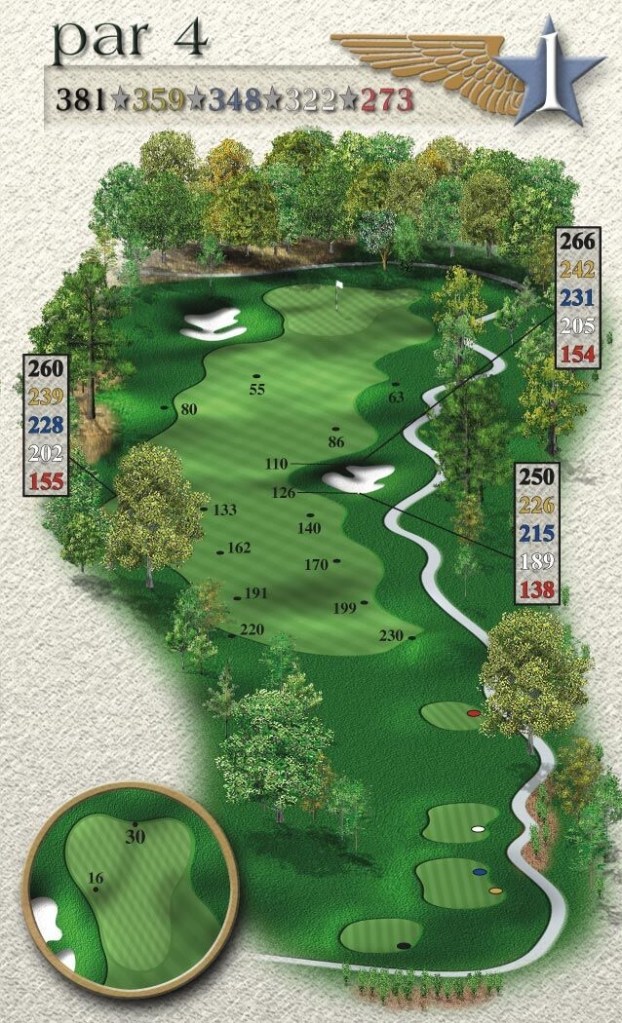
Hole # 1
Par 4 – 381 yards
The opening hole is a short par 4, giving players an early birdie opportunity.
Players must avoid the large bunker guarding the right side of the fairway.
A good tee shot will leave you with a wedge into the green.
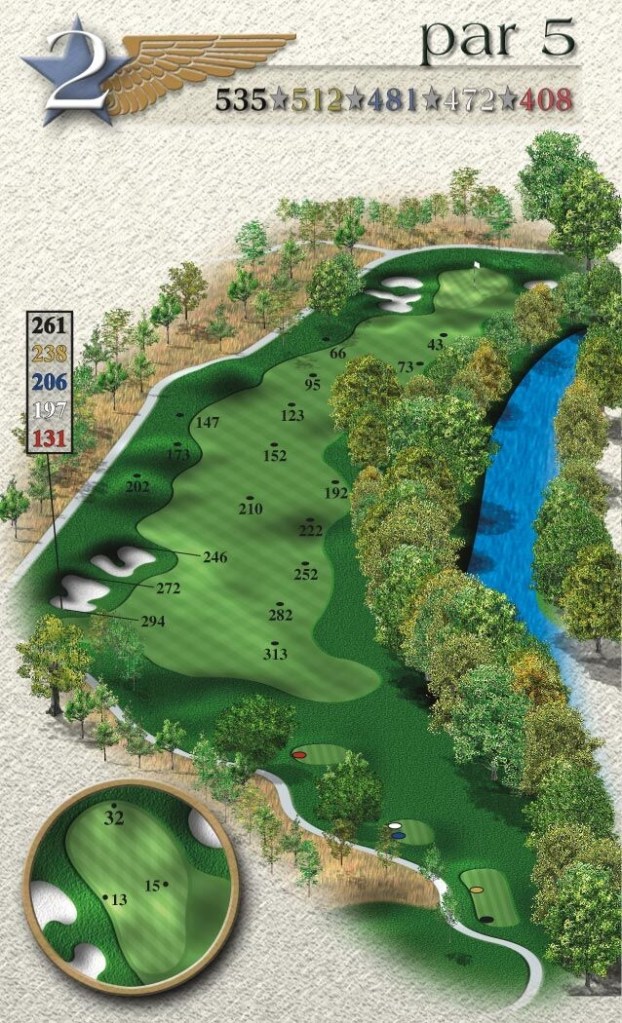
Hole # 2
Par 5 – 535 yards
The shortest par 5 on the golf course, hole # 2, is reachable in two.
Avoid the fairway bunkers on the left.
Pay attention to your lay-up to keep your ball away from the two trees guarding the left side.
Another early birdie opportunity.
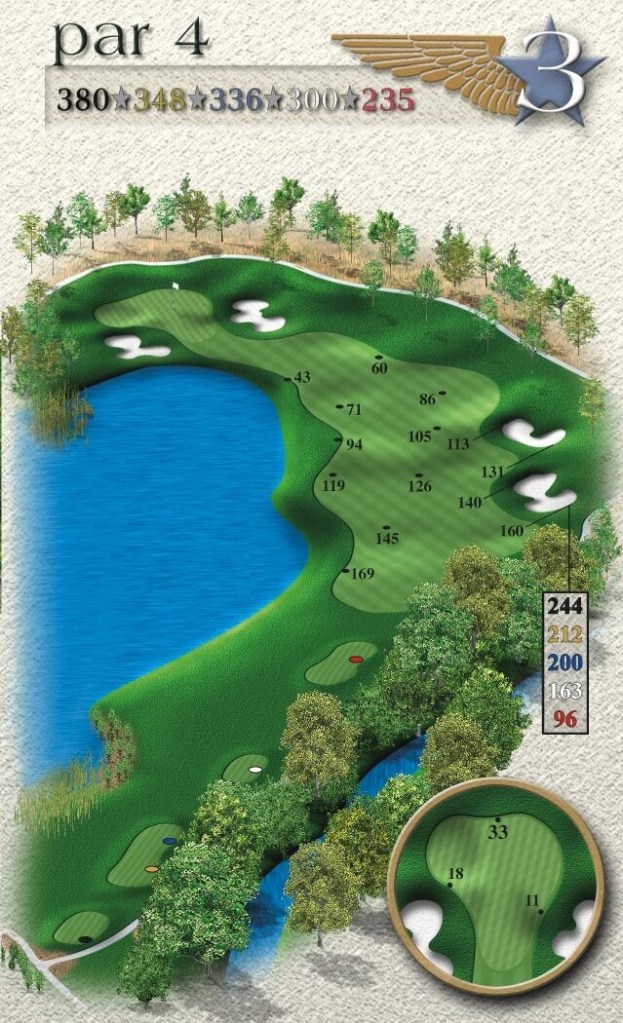
Hole # 3
Par 4 – 380 yards
A risk-reward hole with water protecting the entire left side of the hole.
Players will have the option of playing this hole with a long-iron off the tee and a mid-iron into the green.
The more aggressive players will hit the driver off the tee and challenge the water to set up a short wedge shot into the green.
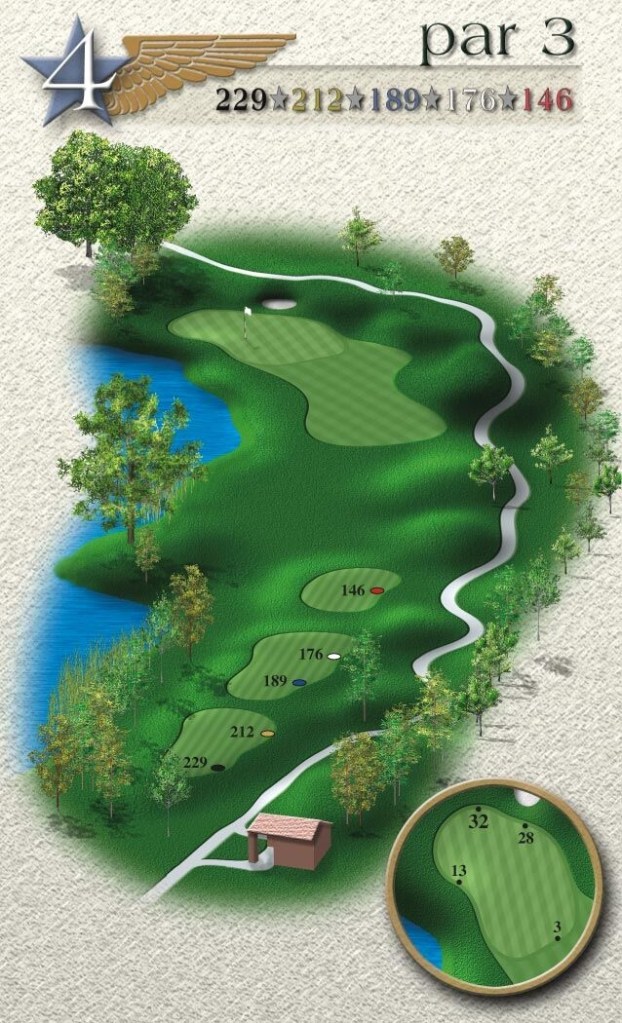
Hole # 4
Par 3 – 229 yards
The longest and most difficult par 3 on the golf course.
Water protects the entire left side of the hole, forcing players to play away from the water.
This hole is consistently one of the most difficult, and players will have to be careful not to make a big number here.
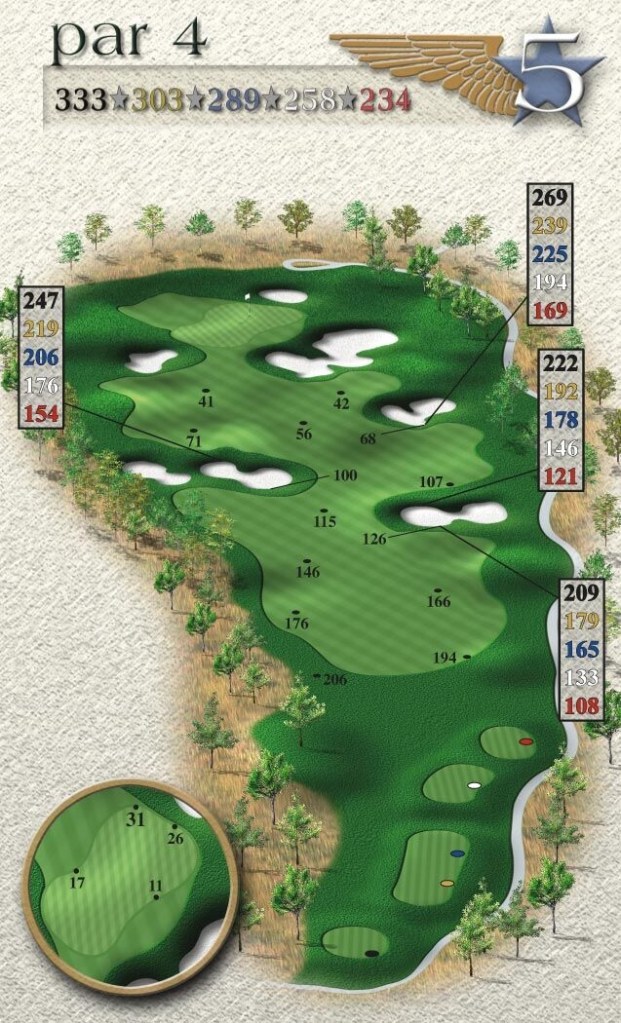
Hole # 5
Par 4 – 333 yards
One of my favorite holes, this short par 4, gives the players several options.
This is a great hole to watch because it is reachable for the long hitters, and you may see an eagle if a player can drive the green.
Players must be careful not to hit it in one of the fairway bunkers, leaving a difficult recovery shot.
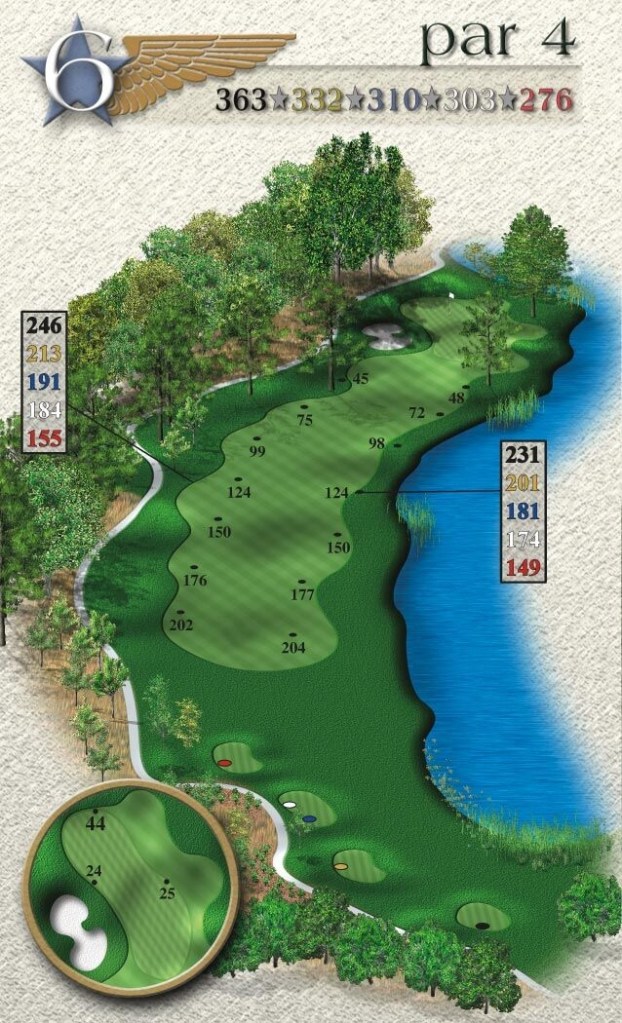
Hole # 6
Par 4 – 363 yards
OakWing’s signature hole.
A dogleg right with water protecting the entire right side of the hole will force players to be careful on this hole.
The green is well protected by a deep greenside bunker and a shallow green.
Distance control into this green is vital.
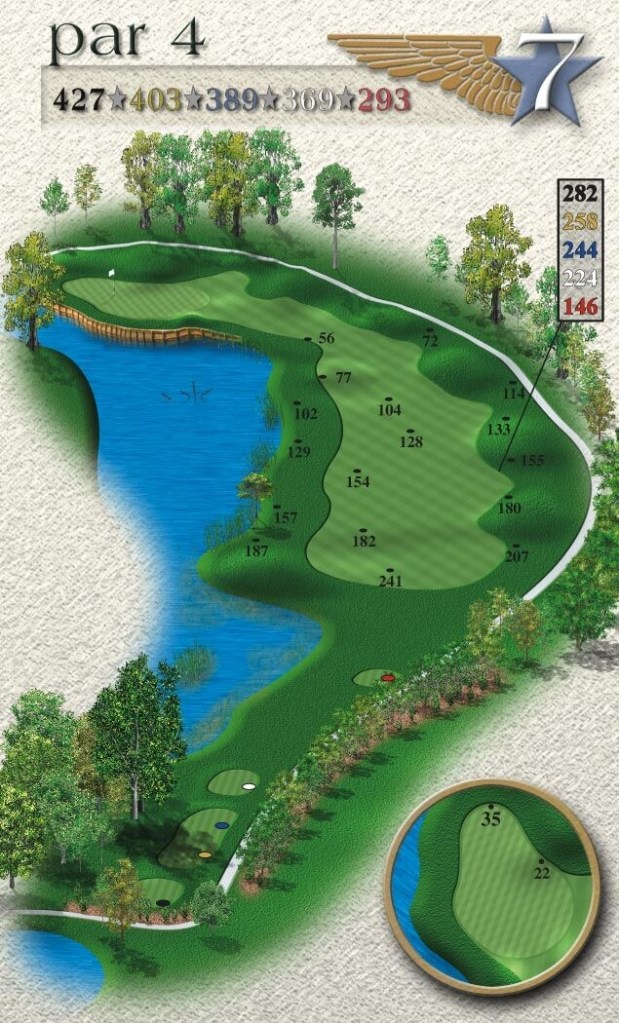
Hole # 7
Par 4 – 427 yards
One of the longest and most challenging holes on the course.
Water protects the entire left side.
Players will have to hit a solid tee shot here to set up a long to mid-iron into this island shaped green.
This is one of the pivotal holes on the front nine, and par is a great score.
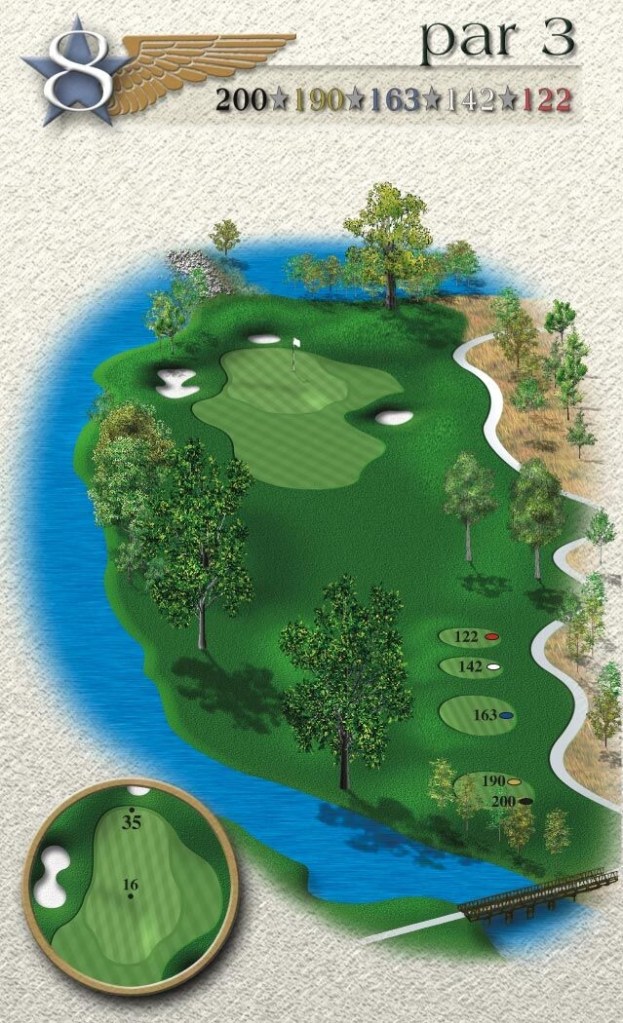
Hole # 8
Par 3 – 200 yards
An excellent par 3, which requires an accurate tee shot.
Deep greenside bunkers protect both sides of the green.
Most players will be hitting a long to mid-iron into this green.
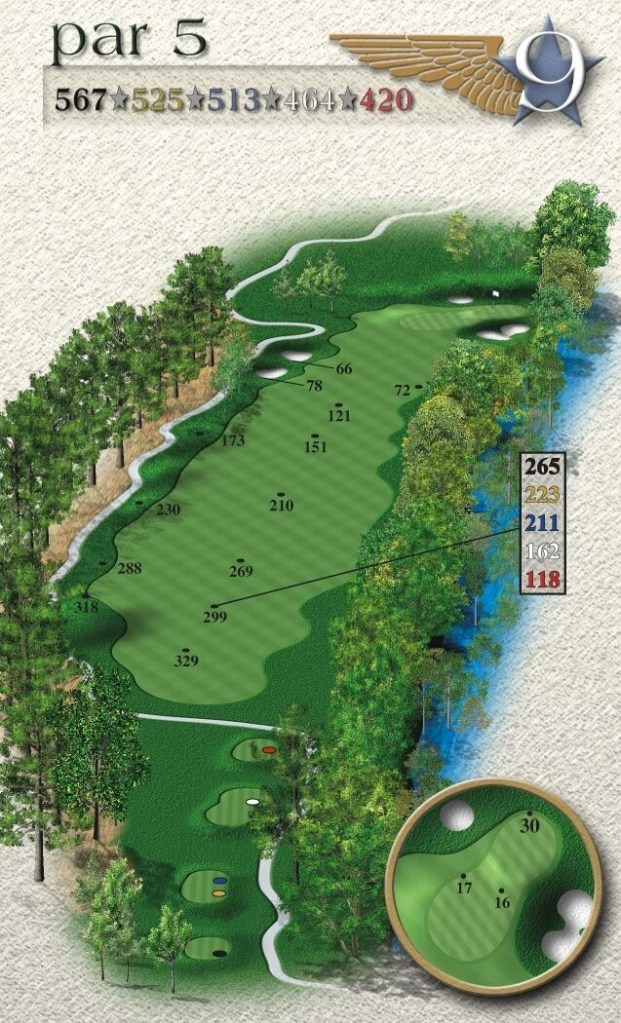
Hole # 9
Par 5 – 567 yards
The large fairway on this par 5 will allow players to hit it hard and long to get into position to reach the green in two.
Fairway bunkers are strategically positioned 85 yards from the green to demand a straight lay upshot from the players.
Another great birdie opportunity.
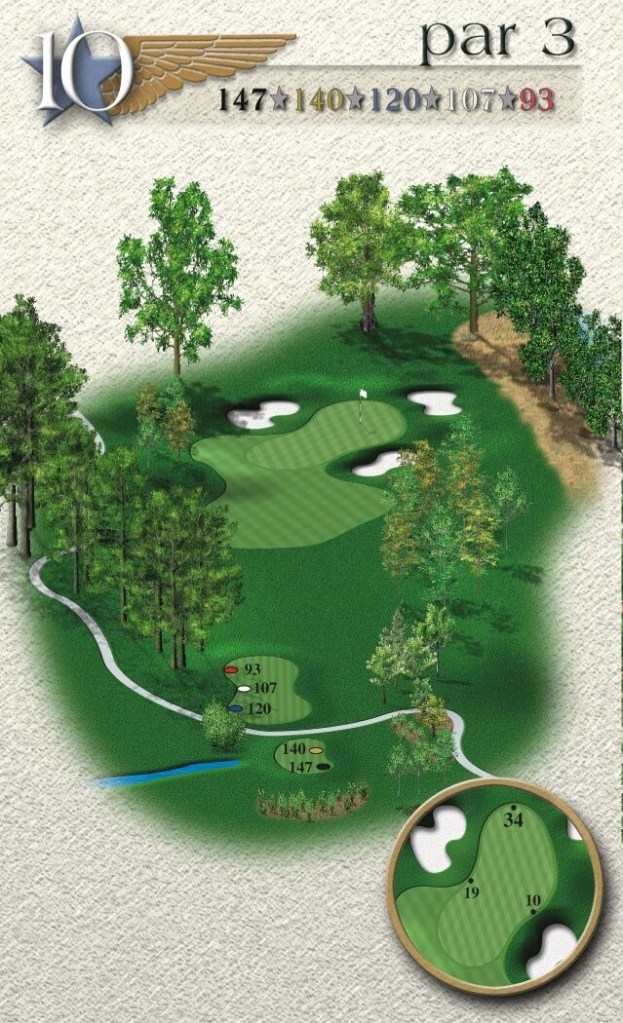
Hole # 10
Par 3 – 147 yards
While this looks like a simple little hole, players must pay attention.
Distance control will be the key because of a very shallow green that works away from the players.
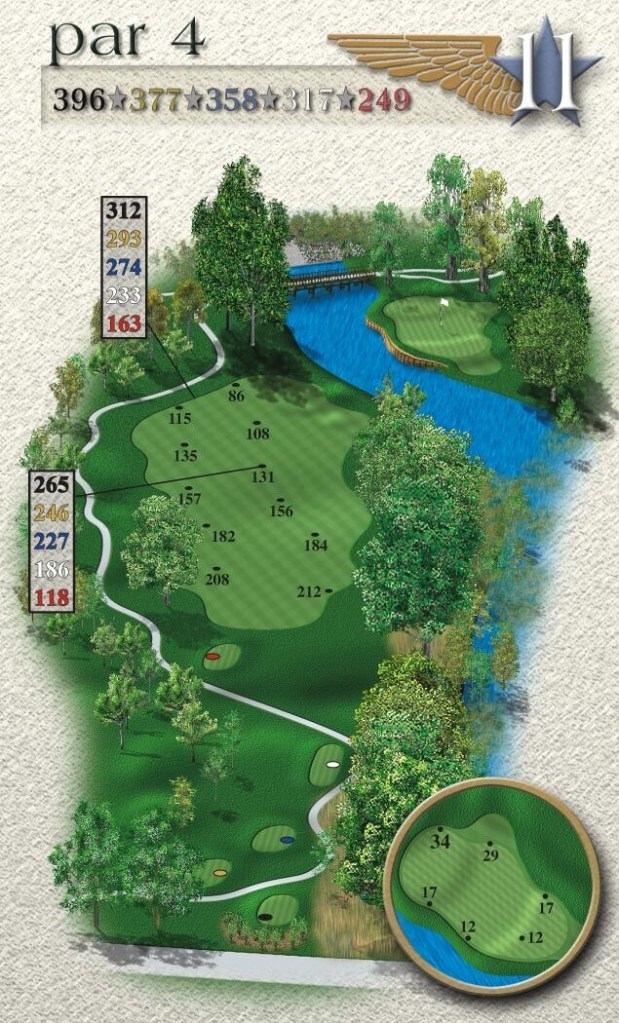
Hole # 11
Par 4 – 396 yards
Players must hit two quality shots on this hole.
Try to position your tee shot to the right side of the fairway to set up a shorter shot into the green.
Distance control on the approach into this green will be vital.
This hole will test the players’ nerves.
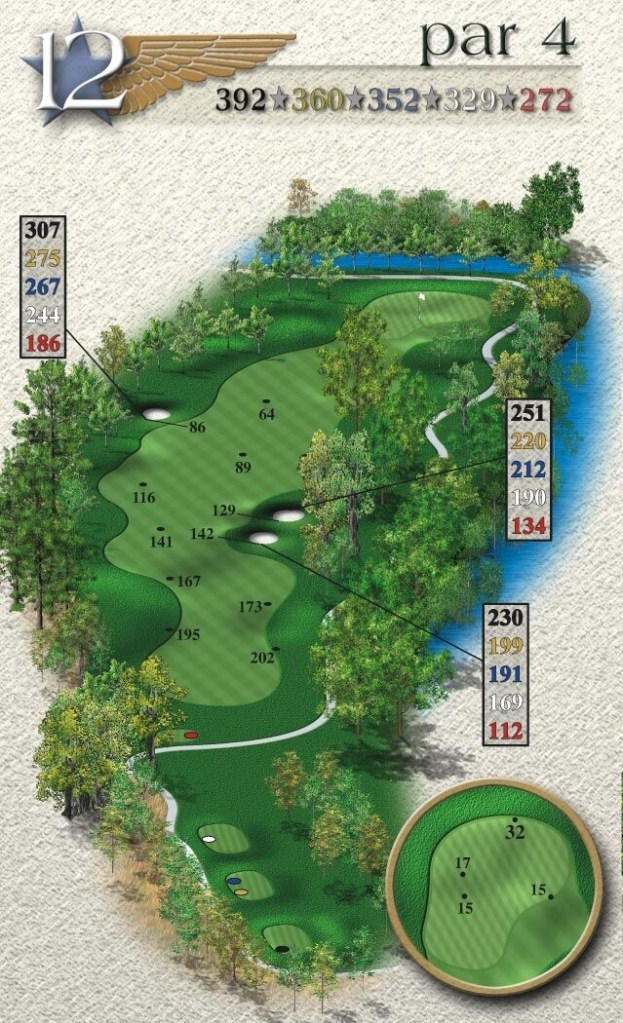
Hole # 12
Par 4 – 393 yards
This short par 4 will be challenged by the big hitters off the tee leaving a short wedge into the green.
Avoid the two fairway bunkers guarding the right side.
The only green not protected by water or sand, but a severely sloped green will test your putting abilities.
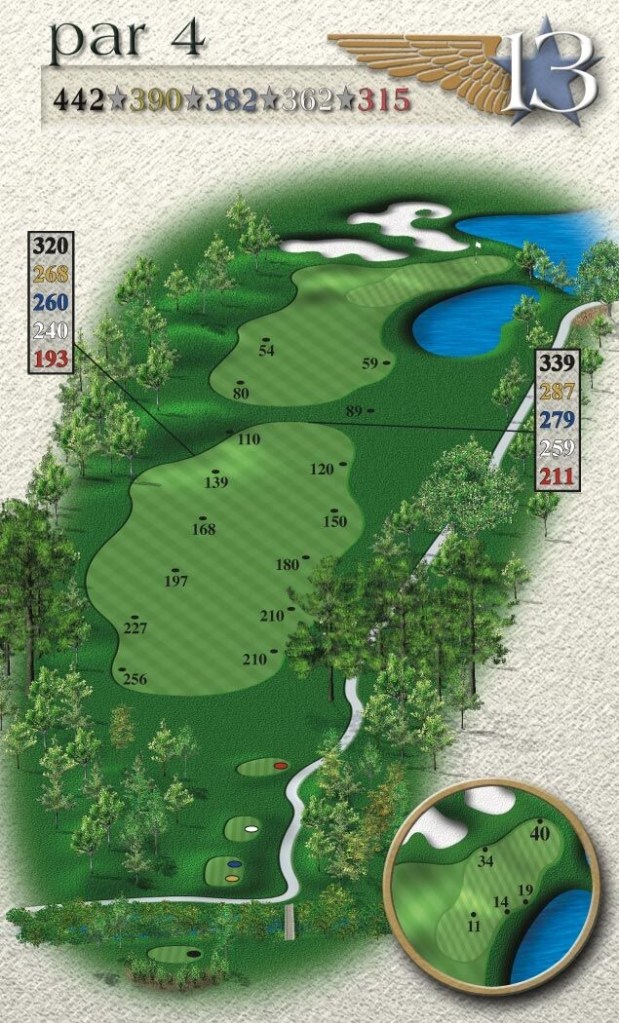
Hole # 13
Par 4 – 442 yards
Another long par 4 requiring a big drive to set up a mid-iron into the green.
Hole 13 is the third hardest hole on the golf course.
Players must be cautious on this hole where par is a good score.
This will be one of the most pivotal holes on the back nine.
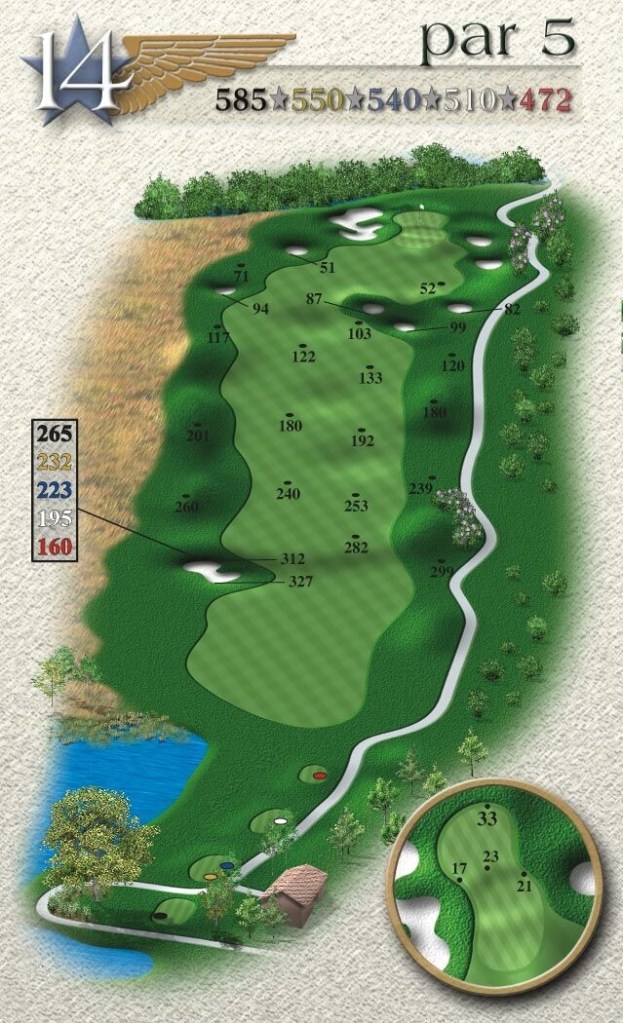
Hole # 14
Par 5 – 585 yards
Wind will play a big factor on this hole.
The green is hidden on the second shot by 3 strategically placed fairway bunkers about 85 yards short of the green.
Favor the left side with your lay-up to make sure to avoid these three bunkers.
The green is well protected by bunkers left and right, and the severely sloped green will test your putting abilities.
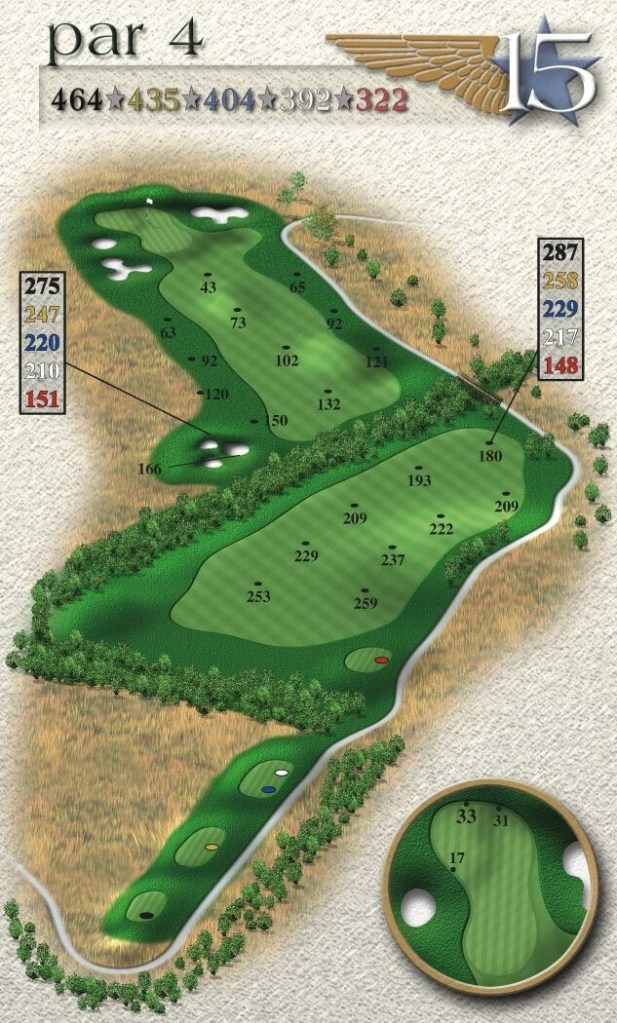
Hole # 15
Par 4 – 464 yards
Another risk-reward hole with two options off the tee.
The bigger hitters will attempt to carry the hazard and two large bunkers 265 yards off the tee.
The shorter hitters will play down the right fairway leaving a long iron into the green.
Par will be a great score.
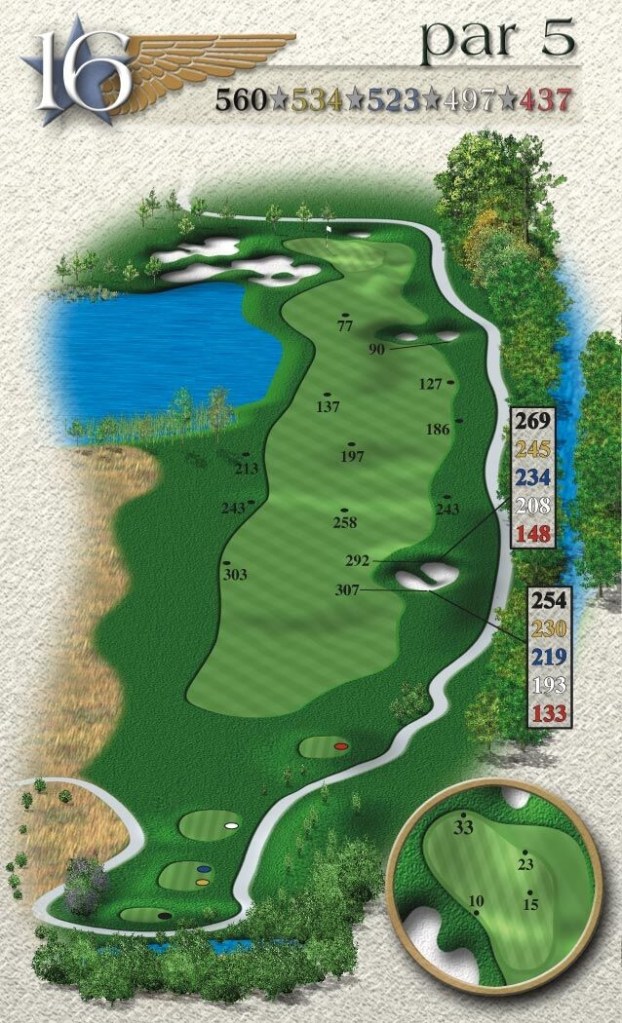
Hole # 16
Par 5 – 560 yards
The most difficult par 5 on the golf course.
The key decision here will be to go for the green or lay up short of two deep faced fairway bunkers.
Players who lay up will be left with a short wedge into another well-protected green with a deep greenside bunker.
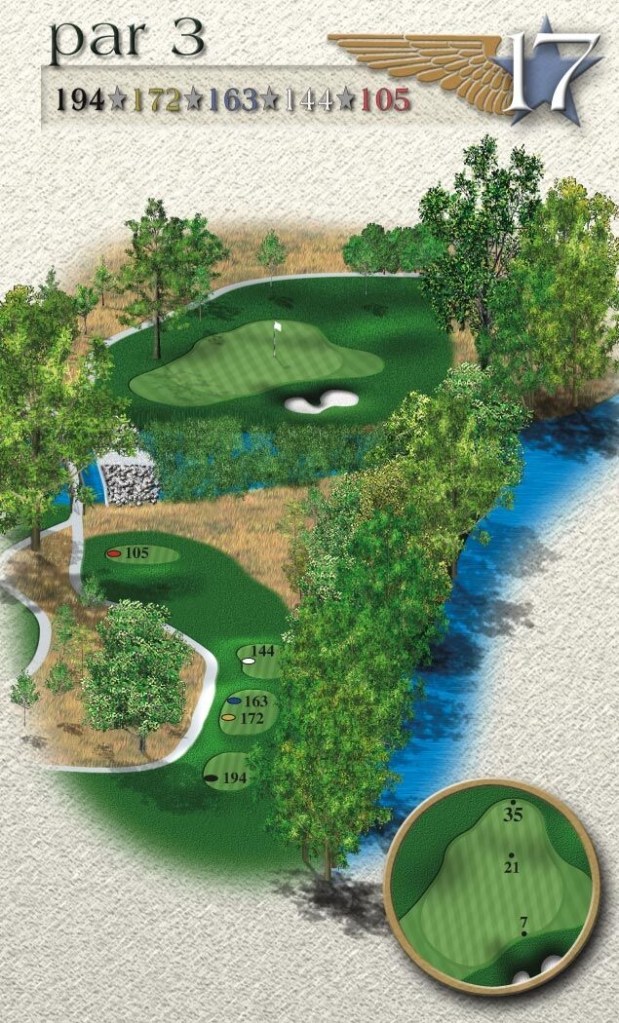
Hole # 17
Par 3 – 194 yards
Another long par 3, players must be cautious here.
Players will be hitting a mid to long iron over water into another well-protected green.
Favor the left side with your tee shot to avoid the large greenside bunker protecting the green.
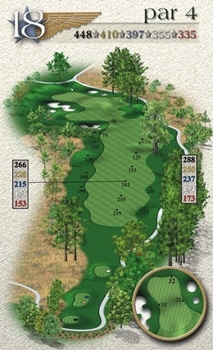
Hole # 18
Par 4 – 448 yards
The finishing hole at OakWing is a great hole.
Wind direction will play a major role on the finishing hole.
Players will be hitting long to mid-irons into another well-protected green.
Coming down the stretch, players will have to hit two solid shots to get out of hole 18 with a par.